Step 1: Open Ads Manager
Go to adsmanager.facebook.com and log in. Stay on the Campaigns tab.

You should now see: a table with the word Campaigns at the top left.
Step 2: Tap + Create
Tap the green + Create button.
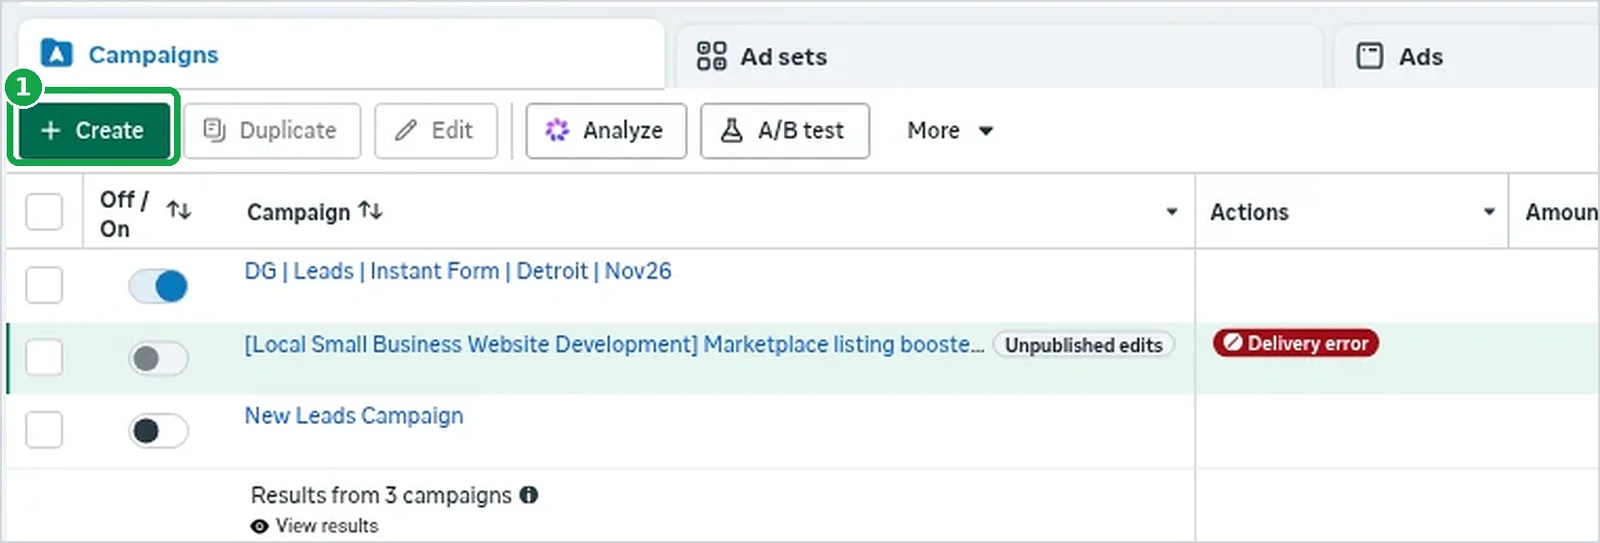
You should now see: a box that says Create new campaign.
Step 3: Pick the Leads goal
Tap Manual campaign setup. Leave buying type on Auction. Tap Leads, then Continue.
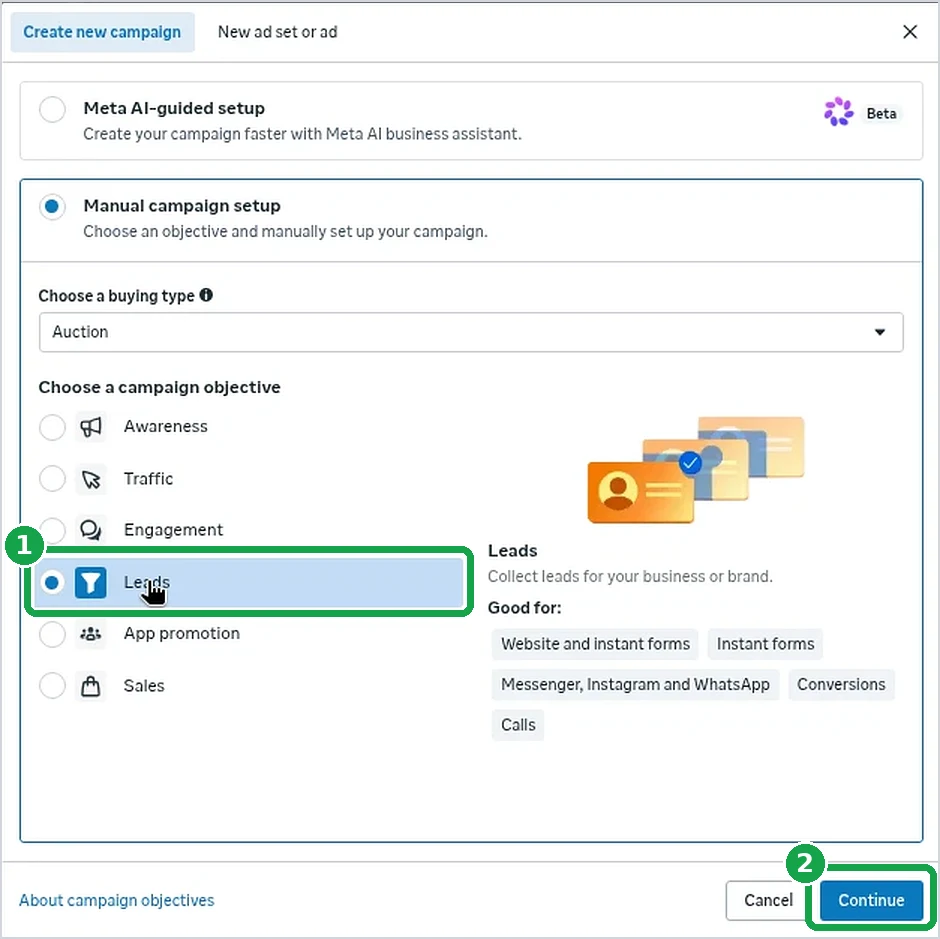
You should now see: the campaign settings page.
Step 4: Give the campaign a name you can read
Type a name in the Campaign name box at the top. Use: business, goal, form, area, month. Mine is DG | Leads | Instant Form | Detroit | Nov26.
A roofer might use "Smith Roofing | Leads | Instant Form | Warren | Dec26".
[BUSINESS] | Leads | Instant Form | [CITY] | [MONTH][YEAR]

You should now see: your new name at the top of the page.
Step 5: Choose Instant forms
Tap Next to go to the ad set page. Find Conversion location. Pick Instant forms, then pick your Facebook Page.
Instant forms means the lead stays inside Facebook. It's what the Leads goal is made for.
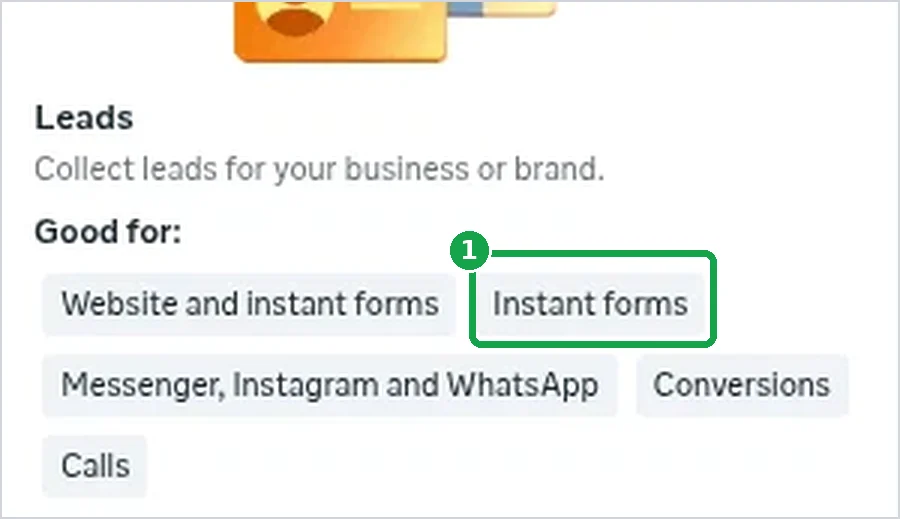
You should now see: Instant forms picked, and your Page's name under it.
Step 6: Set your daily budget
Under Budget, pick Daily budget and type an amount. I use $20.
Facebook may spend a bit more on a busy day and less on a slow one. It evens out over the week.
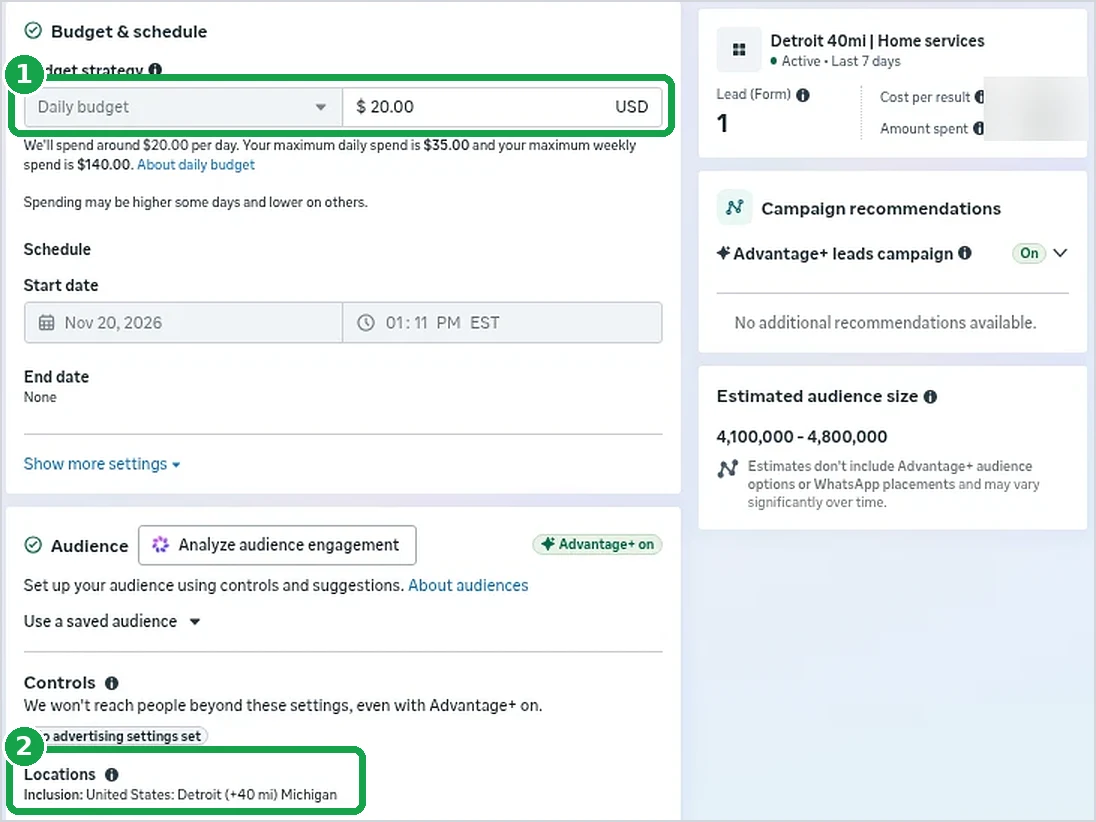
You should now see: your daily amount in the budget box.
Step 7: Set your area
Scroll to Locations. Type your city and pick a distance around it. Mine is Detroit plus 40 miles.
Leave the other audience settings alone. Facebook is good at finding people in your area.
You should now see: your city and distance under Locations.
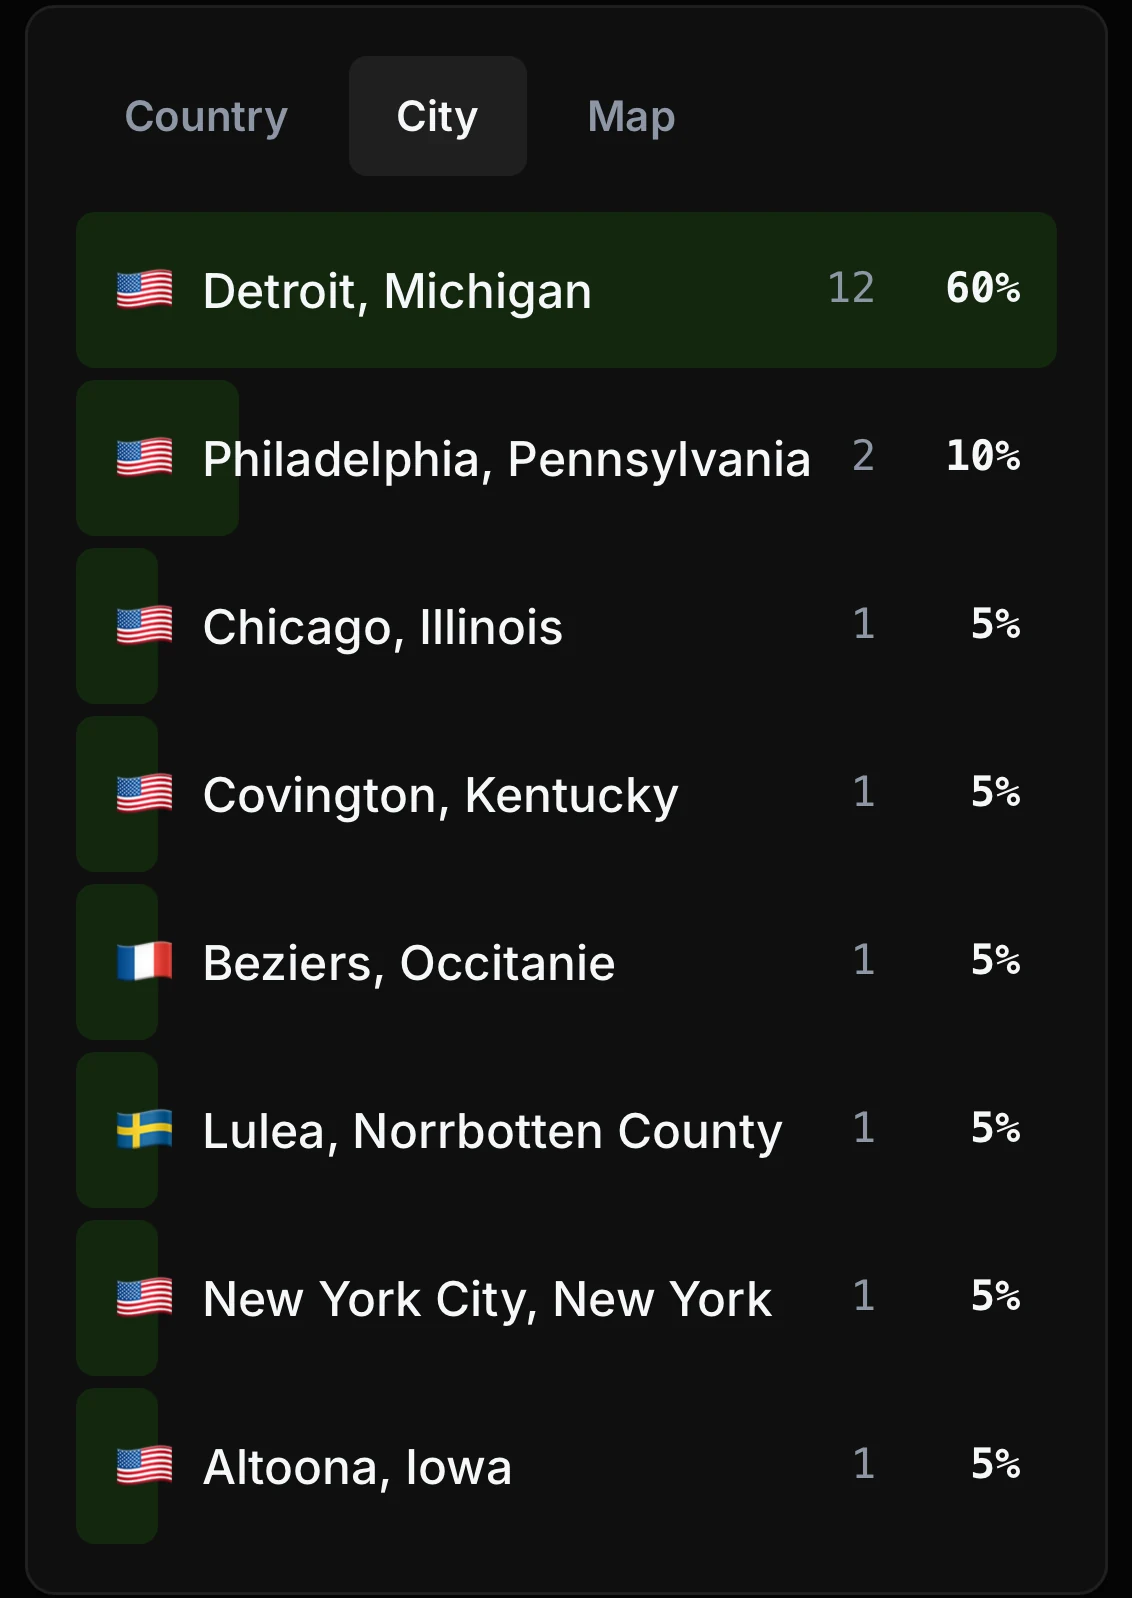
Did it work? My site tracker says yes. Detroit is the top city for my site visitors.
Step 8: Add your ad
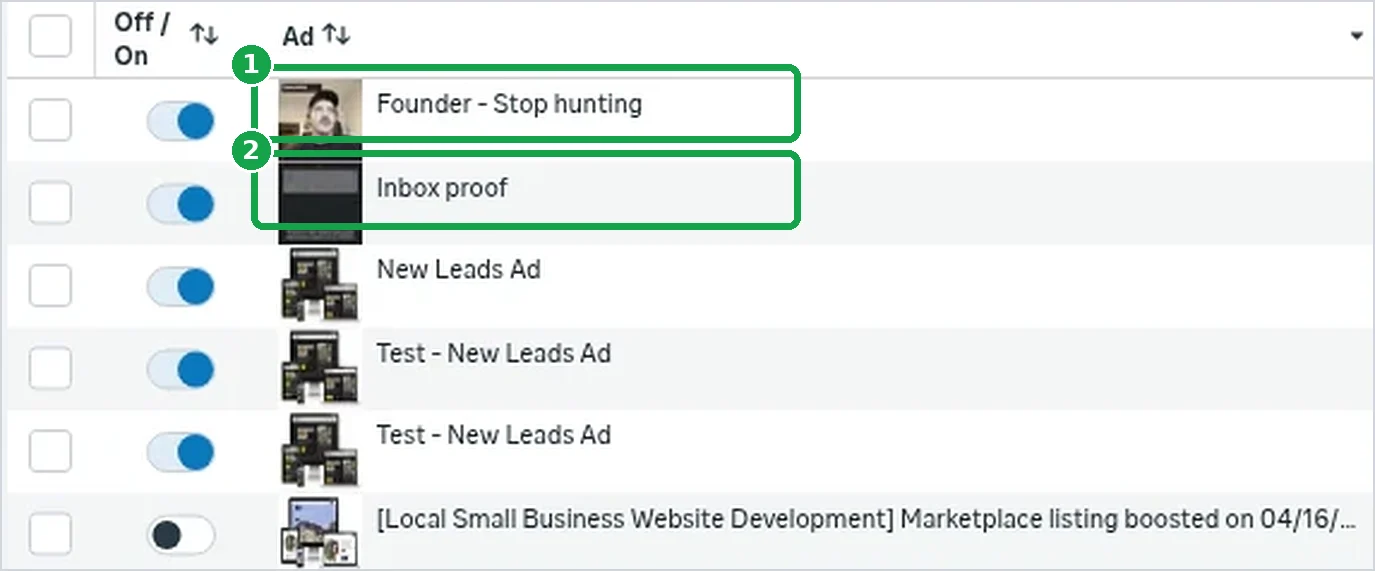
Tap Next to go to the ad page. Add a real photo or a short phone video of you or your work. No stock photos.
Paste the text and headline your AI wrote (part 1). Pick a button like Get quote.
Build the ad in my Leads campaign:
Photo or video: [E.G. THE BEFORE-AND-AFTER PHOTO]
Ad text: [PASTE THE TEXT YOU PICKED]
Headline: [E.G. EPOXY GARAGE FLOORS IN MACOMB]
Button: [GET QUOTE]
Form: [FORM NAME]
Show me how it looks on a phone before you save it. Don't publish.
You should now see: a preview of your ad on a phone screen.
Step 9: Build a short form
On the same ad page, find Instant form and tap Create form. Keep it short. Every extra question loses people.
What goes in the form
- One line that says what they get: "Tell us about your project and we'll call you back."
- Name, phone and email. Facebook fills these in for them.
- One or two easy questions, like "What kind of project?" (garage floor, basement, shop).
- Your privacy policy link. Facebook requires it.
- A thank-you screen that says when you'll call, with your phone number.
Plan a short Facebook instant form for my business.
Business: [WHAT YOU DO]
Area: [YOUR CITY]
Jobs I want: [E.G. 2-CAR GARAGE FLOORS AND UP]
Jobs I don't want: [E.G. OUTSIDE MY AREA, TOO SMALL]
My phone: [YOUR PHONE]
Privacy policy link: [YOUR LINK]
Give me: a short intro line, which contact boxes to keep (name, phone, email), 2 easy multiple-choice questions, and thank-you text that says when I'll call.
Give each form a clear name. Mine are DG Get Started v1, v2 and v3.
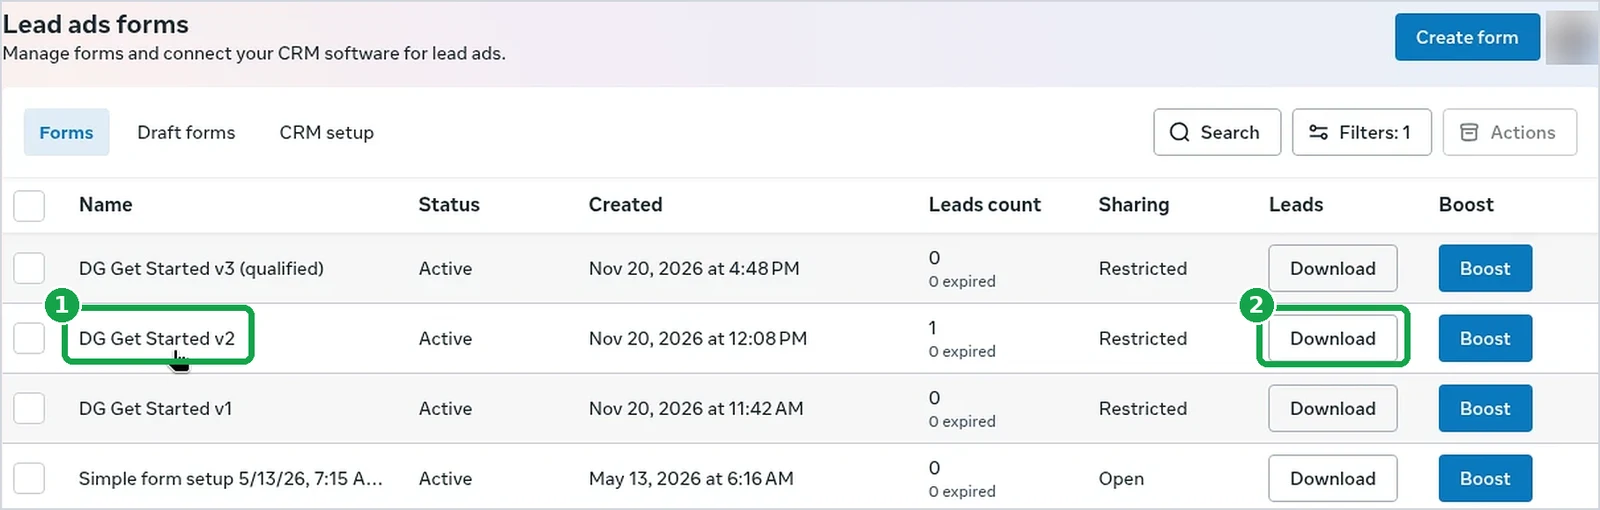
You should now see: your new form picked on the ad page.
Step 10: Check everything once
Go back through it: budget, area, the right form, the right Page. Using AI? Paste this so it stops and shows you first.
Before anything goes live, show me a short list:
- campaign name
- goal
- daily budget
- area
- which form each ad uses
- the ad text
Tell me anything that could cost more than I expect.
Don't publish yet. Wait for me to say yes.
Checklist before you publish
| Setting | What I use |
|---|---|
| Campaign goal | Leads |
| Conversion location | Instant forms |
| Budget | Daily, $20 a day (pick your own) |
| Area | Your city + a distance (mine: Detroit + 40 miles) |
| Audience | Leave it alone to start |
| Ad | Real photo or phone video. No stock photos. |
| Form | Short, with your privacy policy link |
| Name | Business | Leads | Instant Form | Area | Month |
You should now see: every line in the checklist matches your campaign.
Step 11: Tap Review and publish
Tap Review and publish at the top right, then Publish. Facebook checks your ad first. That can take a few minutes or a few hours.

You should now see: your campaign in the list with the switch on. It may say "In review" for a bit.
Next
Before you walk away, set up the safety net: Facebook ads automated rules.
Want me to set this up for you?
I'm Danny, a web designer in Metro Detroit. If you'd rather have someone set up your ads and the website they point to, tell me about your business and I'll call you back. Or call me at (313) 801-7388.
Tell me about your business